For the full guide, please see the download at the end of the article.
TABLE OF CONTENTS
- Adding a Call Module
- Configuring a Primary Call Module
- Configuring a Secondary Call Module
- Adding a Door onto A Call Module
- For A Secondary Call Module
Adding a Call Module
Click on New Device

Connect the Call Module into the IPerVoice network.
It should now appear in New Device list if item does not appear please check cable or move the Call Module and connect directly to POE Switch with pre-manufactured Ethernet cable.
Please note the Call Module may take up to 20 Minutes to appear due to firmware matching between the Server and the Call Module.
If this is a replacement item for a previously configured unit which is now faulty click on Replace and the item which is faulty will appear then click Replace corresponding with the Call Module to be replaced.
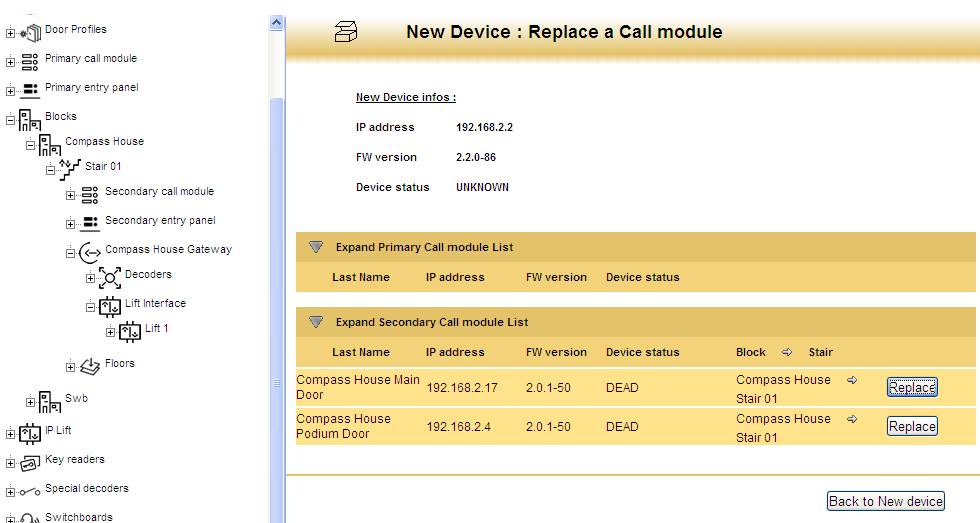
Select Call Module to be replaced
Then Click OK
The setting will now be copied on to the replacement Call Module
Configuring a Primary Call Module
The Call Module will appear in New Devices Click on Configure.
A Primary Call Module can call Any Apartment in Any Block however the Apartment Names can only be seen when the Primary Call Module has Blocks assigned to it.
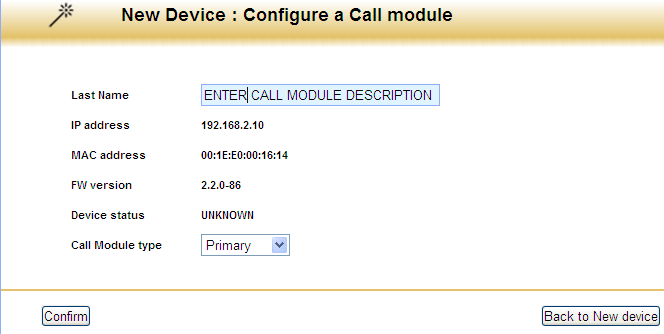
Enter Call Module description in Last Name
Then Click Confirm
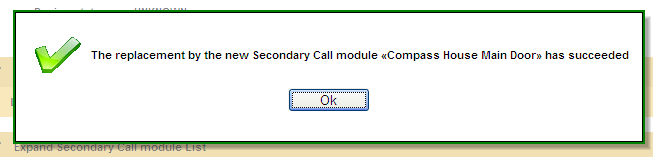
This will bring up a pop-up screen click on OK
The Call Module should now appear as in Primary Call Modules.
- Expand Block Group and select the blocks the Call Module is required to call
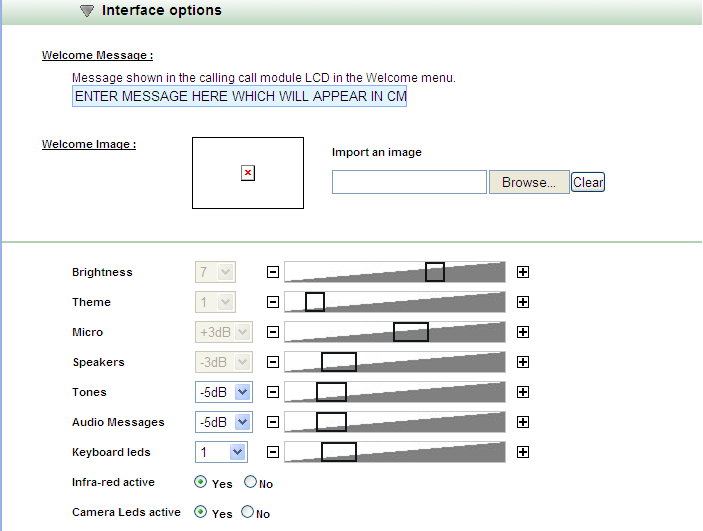
- Expand Interface Option
- Enter a Welcome Message (this is displayed on Call Module) if required
- Expand Tones and Select -5db (Key Pad Tones)
- Expand Audio Messages and Select -5db (Call Reassurance Tone)
- Scroll To Confirm and Click on Confirm Then OK
Configuring a Secondary Call Module
A Secondary Call Module can only call the block it is assigned to.

Click on Configure
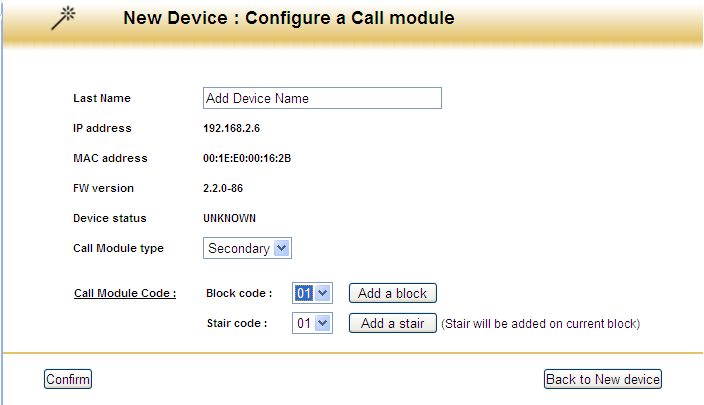
Add Device Name in Last Name field. This is what you require the Call module to be known as in the system.
Select from the drop down menu Call Module Type Select Secondary
Call Module Code will now appear on the screen
Select the Block Code that the Call Module needs to be assigned to.
The Stair Code should be 01 unless your site has multiple stairs
Click on Confirm
Click on OK
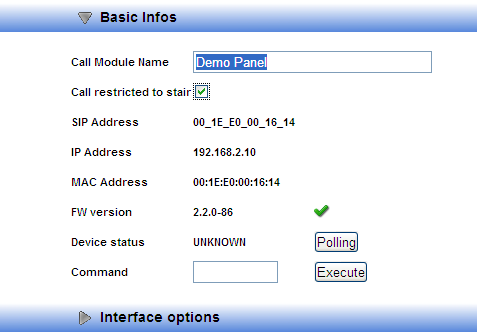
Click on Call Restricted to Stair (This will only allow calls to that Block)
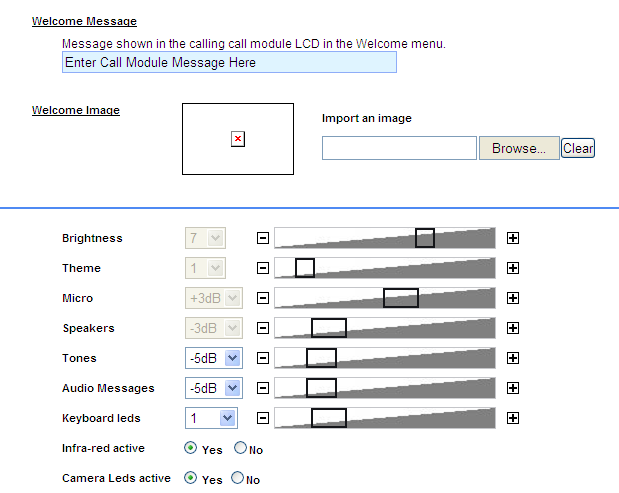
- Expand Interface Option
- Enter a Welcome Message (this is displayed on Call Module) if required
- Expand Tones and Select -5db (Key Pad Tones)
- Expand Audio Messages and Select -5db (Call Reassurance Tone)
- Scroll To Confirm and Click on Confirm
- Then Click on OK
Adding a Door onto A Call Module
Once the Call Module has been added onto the system then a door can be added.
For a Primary Call Module
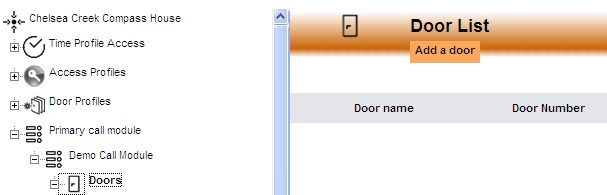
On the Device Tree (left hand side)
Select Primary Call Module
Select the Call Module which needs the door added
Select Doors
On Right Hand Side select Add a Door (under Door List)

Click on Confirm then OK
For A Secondary Call Module
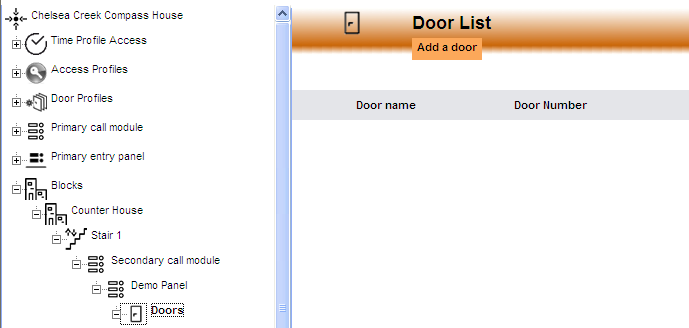
On the Device Tree (left hand side)
Select the Block
Select Stair
Select Secondary Call Module
Select the Call Module which needs the door to be added
Select Doors
On the right hand side select Add a Door (under Door List)
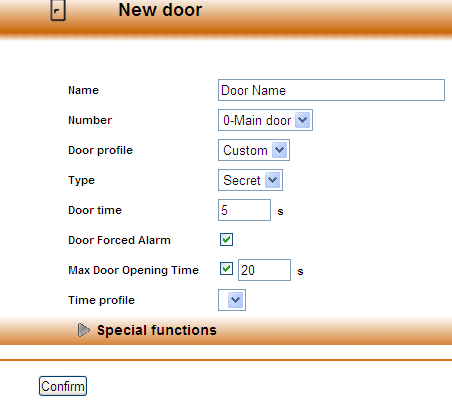
Click on Confirm then OK
The Call Module and Door are now added to the system.
Please add the door to the required Access Profiles.
Click on Update System
