Add a New Key Reader
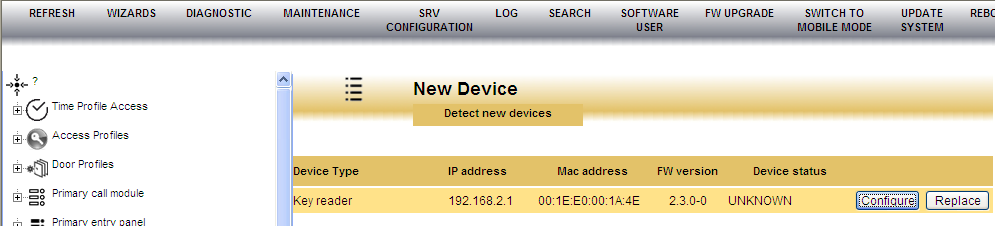
1. Start by clicking on New Device
- Check the MAC Address of the item you wish to configure and Click on Configure
- The MAC Address is located on a label on the rear of the Key Reader

2. Now enter the location that best describes the Reader Location. For Example, the Car Park Door from Lobby. When done Click on Confirm.
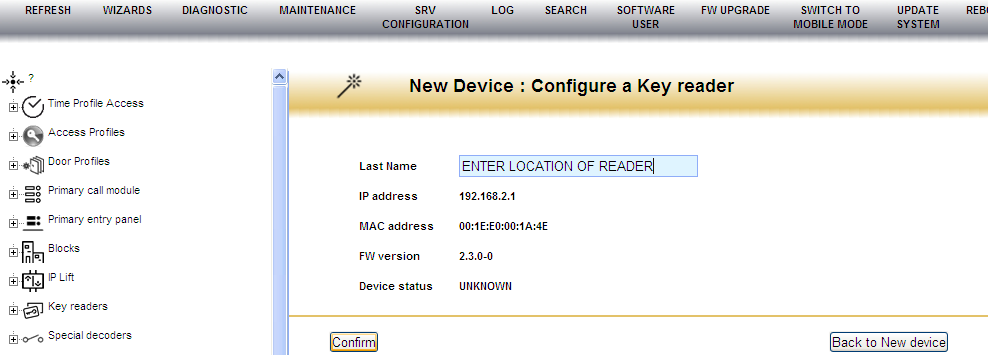
3. This will bring a secondary pop-up box - click on OK (This can be changed at anytime).
- This will now add the Key Reader into the Key Reader List (Left Hand Side of Screen)
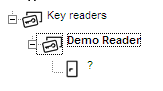
4. Click on the + next to the Key Reader you are configuring and there will be a symbol like this

- This means that you will need to associate a Door to the Key Reader. Click on this symbol to add a door.
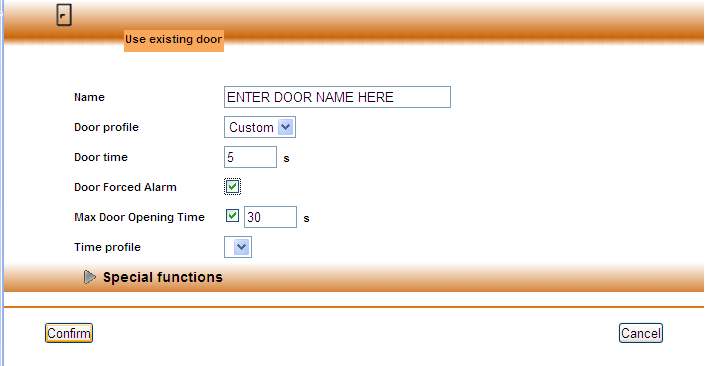
5. Enter a door name here (see screenshot below)...
- Leave door profile as Custom
- Enter a Door Time (This is the time that you require the door relay to operate)
- Select Door Forced Alarm if required (This requires a Door Contact to be Wired)
- Select Door Opening Time if required (This requires a Door Contact to be Wired)
- Click on Confirm.
6. This will bring a secondary pop-up box then click on OK - This can be changed at anytime.
- The Key Reader with associated Door is now added to the ipervoice database.
- This Key Reader will now need to be added to all the Access Profiles which are required to use this door.
7. Click on the + next to Access Profile on the ipervoice tree menu on the left hand side of the screen.
- This will show all the Access Profiles on the Database. Click on the Access Profile that is required to use this door.
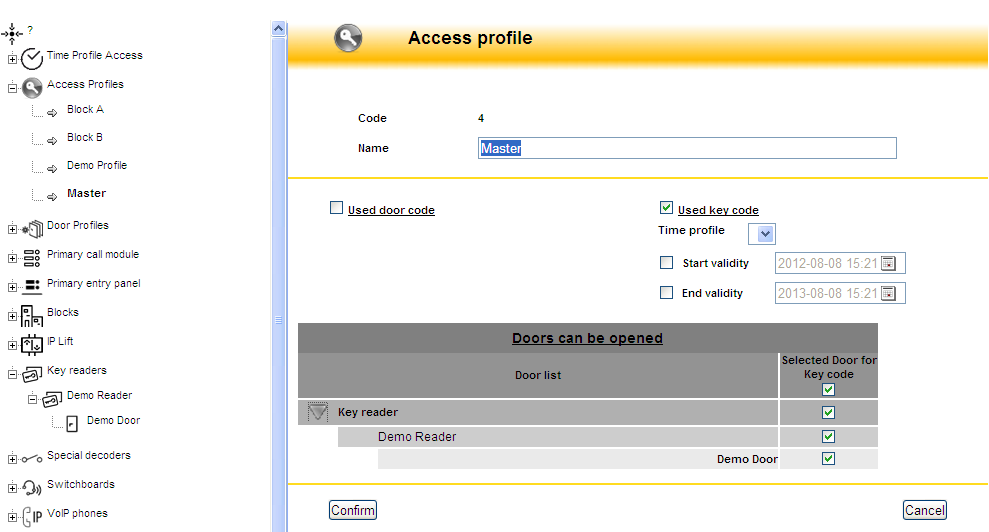
8. In this example I have selected Master.
- Expand the Key Reader tab and this will show all readers that are associated with this profile.

9. Click on the box towards the Right Hand Side to include the reader into the Access Profile.
- A Key Reader can be added to as many of the Access Profiles as required.
- Click on Confirm - This will bring a secondary pop-up box then click on OK.

10. Click on update system for the changes to be completed .
Replace a Faulty Key Reader
1. Check MAC Address of the item you wish to configure and Click on Replace
- This will bring up a list of the Key Readers that are dead on the system
2. Select the Key Reader you wish to replace then Click on Replace
- This will bring a secondary pop-up box then click on OK - This will then copy the setting from the old Key Reader to the new Key Reader.

3. Click on update system for the changes to be completed.

