Configuration of the intercom panel is carried out using the browser of a smartphone or tablet.
The procedure consists of enabling the intercom panel’s built in Wi-Fi direct signal, and then connecting your smartphone or tablet to access the built in configuration web page.
Press and hold the programming button on the rear of the 1083/38 or 1083/48 for five seconds. The three LEDs on the front will flash.
At this point the intercom panel is now a Wi-Fi access point, and it is necessary to connect your smart phone or tablet to it.
In your smart phone or tablet settings first turn off mobile data.
Now in your device Wi-Fi settings, find the intercom panel, which will look something like this –

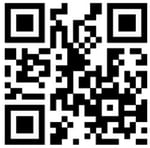
Once you are connected to the intercom panel Wi-Fi, scan this QR code or the QR code on the rear of the product (or type 192.168.4.1 into your browser bar) –
You should now be connected to the configuration page of the intercom station.
First change the language option to English and change the Advanced calling button configuration from Off to On –

Click the button icon and change the function from Call Apt. to Special Function –
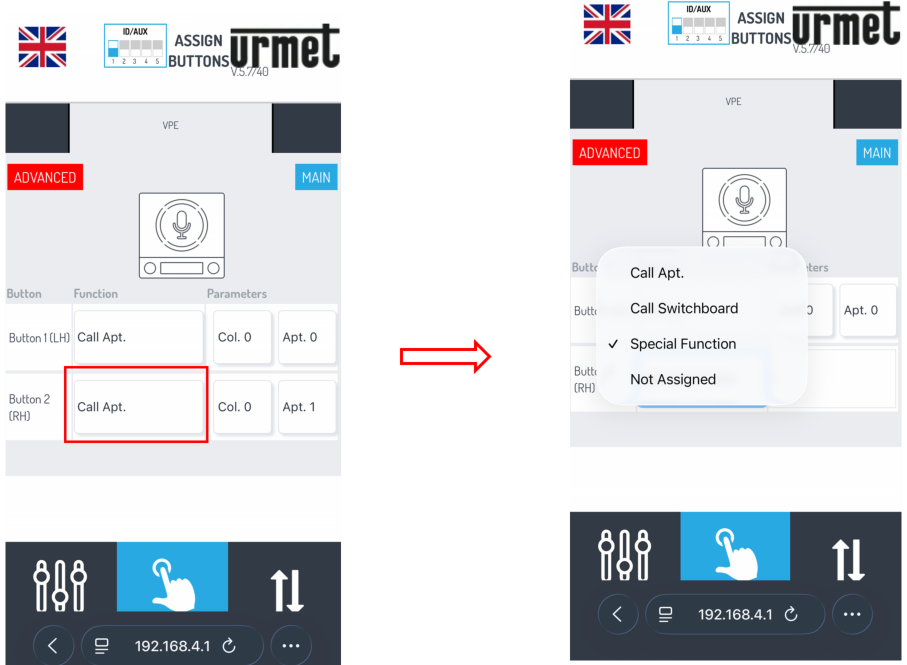
Note that you must choose the button on the intercom panel that has been designated as the Trades button. This will be highlighted on your installation diagram.
In this example, button 2 has been chosen.
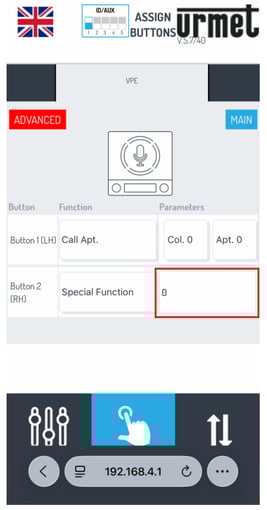
In the Parameters field, enter the address (typically between 0 and 127) of the 1083/80 Digital Relay that the button will trigger. This information will be shown on your installation diagram.
In this case the address is 0 –
Click the Transfer button and the click Send and close –

You will see this message –

